1:在D:\wamp\bin\apache\apache2.2.21\conf目录下打开 httpd.conf 查找到
#include conf/extra/httpd-vhosts.conf      把前面的#去掉并保存
#LoadModule rewrite_module modules/mod_rewrite.so   把前面的#去掉并保存
2:在D:\wamp\bin\apache\apache2.2.21\conf\extra目录下打开httpd-vhosts.conf 添加
<VirtualHost *:80>
    ServerAdmin webmaster@dummy-host.example.com
    DocumentRoot "c:/Apache2/docs/dummy-host.example.com"
    ServerName dummy-host.example.com
    ServerAlias www.dummy-host.example.com
    ErrorLog "logs/dummy-host.example.com-error.log"
    CustomLog "logs/dummy-host.example.com-access.log" common
</VirtualHost>

<VirtualHost *:80>
    ServerAdmin webmaster@dummy-host2.example.com
    DocumentRoot "c:/Apache2/docs/dummy-host2.example.com"
    ServerName dummy-host2.example.com
    ErrorLog "logs/dummy-host2.example.com-error.log"
    CustomLog "logs/dummy-host2.example.com-access.log" common
</VirtualHost>

<VirtualHost *:80>
    ServerAdmin webmaster@dummy-host2.example.com
    DocumentRoot "D:\wamp\www\expendables\ledou_member\program\branches\member_20170502_choujiang\app\webroot"
    ServerName my.member.test.com
    ErrorLog "logs/dummy-host2.example.com-error.log"
    CustomLog "logs/dummy-host2.example.com-access.log" common
</VirtualHost>

<VirtualHost *:80>
    ServerAdmin webmaster@dummy-host2.example.com
    DocumentRoot "D:\wamp\www"
    ServerName 192.168.115.86
    ErrorLog "logs/dummy-host2.example.com-error.log"
    CustomLog "logs/dummy-host2.example.com-access.log" common
</VirtualHost>

<VirtualHost *:80>
    ServerAdmin webmaster@dummy-host2.example.com
    DocumentRoot "D:\wamp\www"
    ServerName 127.0.0.1
    ErrorLog "logs/dummy-host2.example.com-error.log"
    CustomLog "logs/dummy-host2.example.com-access.log" common
</VirtualHost>

<VirtualHost *:80>
    ServerAdmin webmaster@dummy-host2.example.com
    DocumentRoot "D:\wamp\www"
    ServerName localhost
    ErrorLog "logs/dummy-host2.example.com-error.log"
    CustomLog "logs/dummy-host2.example.com-access.log" common
</VirtualHost>
3:在c:\windows\system32\drivers\etc 目录下打开hosts这个文件 添加
127.0.0.1       localhost
127.0.0.1       my.member.test.com

//电脑开始菜单输入notepad 用这个工具编辑 以管理员身份运行才能保存
4:重启wampserver 就能访问 my.member.test.com 以及localhost 这两个站点了
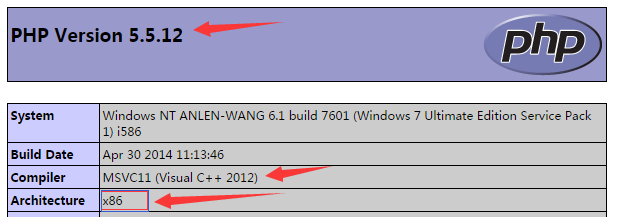
一、查看PHP版本信息
使用 phpinfo() 函数查看 PHP 的版本信息(用于选择扩展包)
<?php phpinfo() ;?>

//创建a.php,内容如上,访问 my.member.test.com/a.php
//↑ PHP版本 5.5.12,编译器版本 Visual C++ 2012,CPU架构 x86
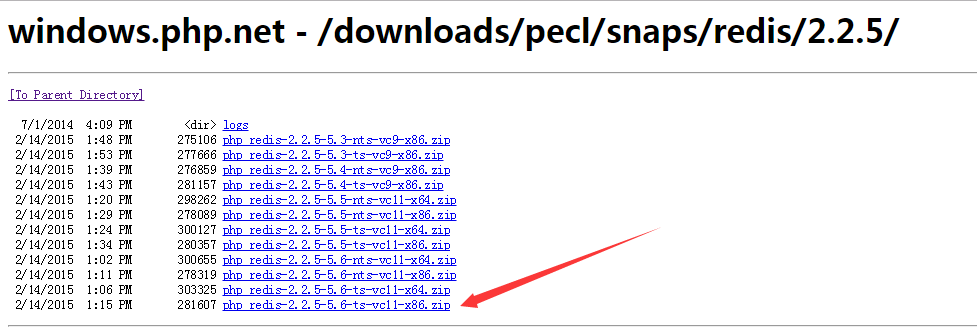
二、根据版本选择扩展包
php_redis.dll 下载地址:http://windows.php.net - /downloads/pecl/snaps/redis/2.2.5/
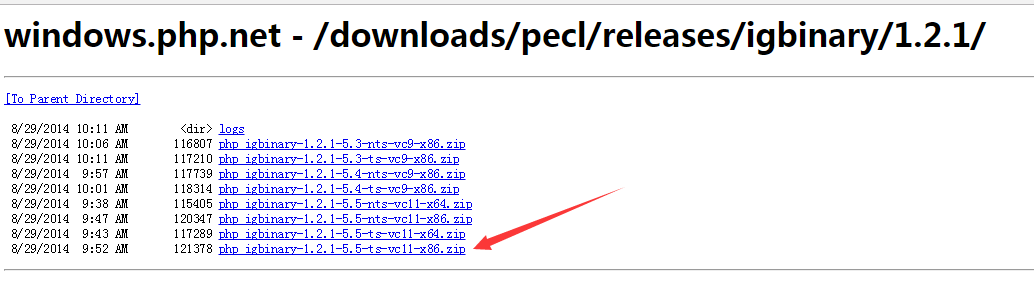
php_igbinary.dll 下载地址:http://windows.php.net - /downloads/pecl/releases/igbinary/1.2.1/
三、安装Redis扩展
解压 zip 文件,只保留 php_redis.dll 和 php_igbinary.dll 文件
将这两个文件拷贝至 [wamp64 安装目录]\bin\php\php5.6.16\ext\ 目录中

四、修改 php.ini 配置
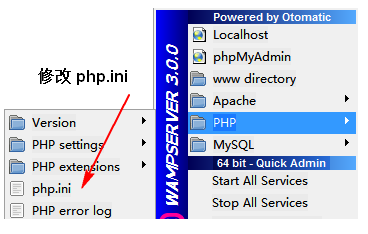
修改 php.ini 在文件中添加:
[redis]
; php_redis
extension=php_igbinary.dll
extension=php_redis.dll
** 注意:php_igbinary.dll 一定要位于 php_redis.dll 之前 **
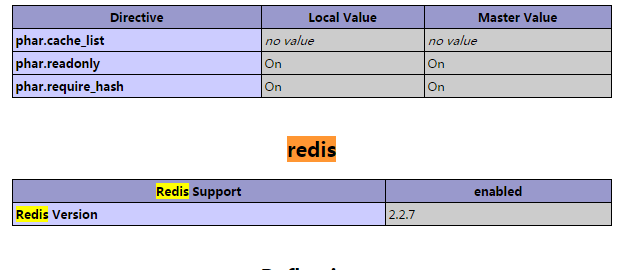
五、查看安装结果
重启 wampserver,使用 phpinfo() 函数查看扩展是否安装,搜索redis